A DIY Guide To Painting Your Kitchen Cabinets
HOW TO PREP
Before you can start painting, you must ensure all surfaces have been thoroughly prepared, as this is what will help you achieve a long-lasting and professional-looking finish. “First, remove all knobs and handles, as well as the contents of your cupboards and drawers,” explain the experts at B&Q. You might even want to remove the doors entirely if they’re awkward to reach. “Use masking tape to protect the hinges and glass and put down dust sheets to protect other parts of the room as necessary,” adds the B&Q team. As primers and paint can drip and splatter, it's best to wear safety goggles from the very beginning, and if you need to use a stepladder, take care and don’t overstretch yourself. Finally, make sure the room is well ventilated, especially if you plan to use a solvent-based paint.
Once the site is set up, it’s time to properly prepare the surfaces. “Wash your cabinets down with sugar soap or a strong detergent solution,” advise the B&Q experts. “This will remove grease and create a smooth canvas – just remember to wipe off any soap residue with a damp cloth.” If you’re still not sure they’re dust-free, you can always run the vacuum over the surface to ensure every last piece of hair or lint is completely removed.
Washing the cabinets is only the first step in surface preparation – you’ll also need to sand and fill them to ensure they’re as smooth as possible before you get anywhere near the primer or paint. “When the cabinets are dry, sand with fine paper, although you can skip this step if you have melamine or high gloss surfaces,” explain the B&Q team. “Fill imperfections with a good quality ready-mixed filler and sand again. Polycell Multi Purpose Polyfilla is great for filling in gaps on kitchen cabinets and cupboards as it's easy to sand, dries white, and it won't shrink or crack.”
HOW TO PRIME
Now it’s time to prime, and you should apply a wood or melamine primer depending on the surface. For instance, laminate cabinets require a special bonding primer. “You might want to use a small roller on doors for a smooth finish,” add the B&Q experts. “Dulux Quick Dry Satinwood is a water-based paint, which means it’s quick drying and won’t smell during the painting process. The finish will also be a subtle sheen that’s easy to clean and touch-up – just what you'll need if you have one or two enthusiastic little cooks at home. If you’re using a brush, make sure it has synthetic bristles to avoid those tell-tale brush marks.”
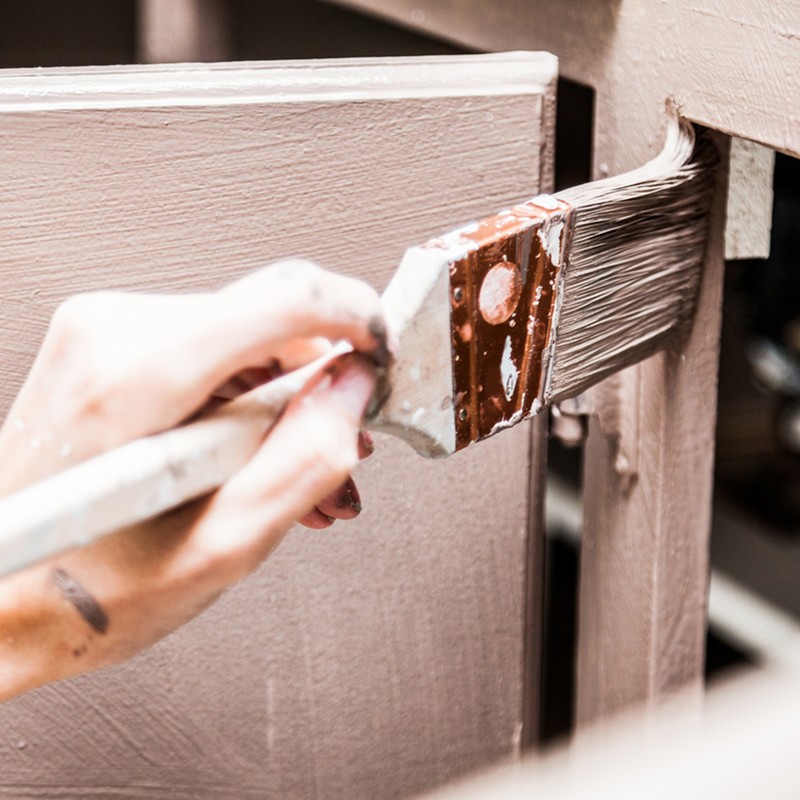
Starting with the cabinet frames, work from the inside out. If you’re painting the inside of the cabinets, start at the back and work toward the front. Use a brush to get into corners and detailed areas, using even strokes, and a mini roller on larger, flat areas. Primer doesn’t have to look perfect – you just need a good base for the paint to sit on.
Once you’re happy with the layer of primer, take a dry roller or brush and lightly go over the surface to remove any build-up – a process known as ‘laying off’.
Finally, prime the doors and drawers separately, if you’ve chosen to remove them. Take off any tape labels but keep them nearby. Start with the backside and apply a smooth, even coat. When its dry, flip the door over and paint the front. Start with the detailed, difficult areas, making sure the primer doesn’t pool in the corners, and feather out the edges. Then work on the larger, flat surfaces with a foam roller. Use painter’s tripods to lift the doors and drawers up from your painting surface, so you can reach the edges more easily. For drawers, it’s better to stick to painting just the front piece rather than the entire thing, as sometimes this can cause them to stick in the frames.
Allow the primer to dry according to the directions – usually for a few hours.
HOW TO PAINT
Now for the fun part. It’s worth noting that interior woodwork paint is available in several different finishes, so look at the range carefully to find one to suit your needs. If you can, opt for an acrylic paint, not vinyl, as it’s more durable and easier to clean up. Also, some paints may require additional preparation, so check the manufacturer's instructions before starting. When you’re painting woodwork, it’s generally best to use a water-based product as they are quick drying and don’t smell like solvent-based paint. Also, make sure the room is well lit so that you can clearly see any areas you might have missed. A final tip? Remember to regularly take a step back to look at the area from different angles to ensure the coverage looks consistent.
Start by applying two coats of your chosen colour – specifically on the cabinet frames, using a high-quality brush for smaller areas and a foam roller or airless paint sprayer for larger surfaces. The technique is the same as for the primer. Also, remember to lay off after the surface has been painted. “After the first coat is completely dry, sand with a fine paper to ensure a smooth, professional finish,” advises the B&Q team. “Also, remember to wipe off any dust with a damp cloth.” Follow the directions for the correct dry time and don’t rush – let the paint completely dry down before moving onto a second coat, or before attempting to put anything back together. You can use a rotating rack to help loose drawers and doors dry quicker.
When the second coat is completely dry, carefully remove the masking tape and put the knobs and handles back on. “If you want even more of a change, you could think about mixing up your hardware and replacing your old handles and knobs with new cheerful and quirky designs to pep up your scheme,” adds the B&Q team.
If you’ve decided to use a top-coat to achieve a certain finish – whether it be gloss, matte, satin or something else – you’ll need to apply this once your second coat is completely dry. Just be mindful not to overload your brush, as interior woodwork paint tends to be thicker than emulsion and will drip if too much is applied.
HOW TO LOOK AFTER IT
It’s usually the case that interior woodwork needs little maintenance once it has been painted. Most importantly, wipe away any condensation when you’re done, and after you cook, as this can cause the wood to swell. Also avoid using chemical-based cleaners as they may damage the finish – instead, look for specially-designed woodwork cleaners which aren’t as abrasive.
Inspired? Here are some the essential tools you might need…
-
Your chosen emulsion colour
-
A dust sheet to protect the floors and furniture
-
A paint kettle/pail
Visit DIY.com
INSPIRATION CREDITS: ISTOCK/AETB
DISCLAIMER: We endeavour to always credit the correct original source of every image we use. If you think a credit may be incorrect, please contact us at [email protected].
/https%3A%2F%2Fslman.com%2Fsites%2Fslman%2Ffiles%2Fwebsite-images%2F2024%2F06%2Fmaiya03-1.jpg?itok=3cyHBZz4)