An Expert Answers 10 Of The Most Googled DIY Questions
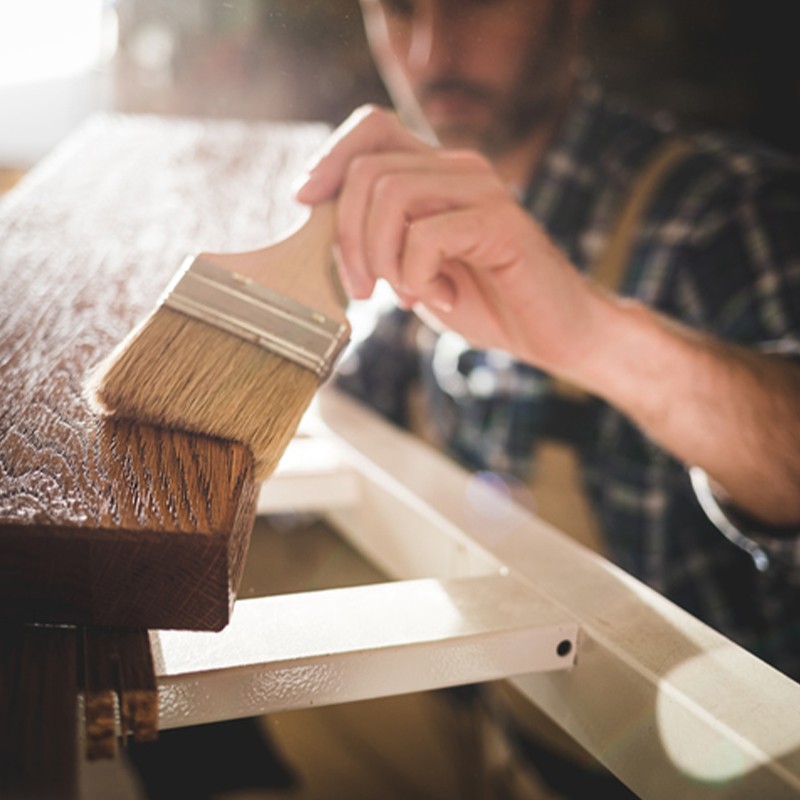
How do you paint skirting boards?
For a seamless look, follow the same colour as your walls or ceiling. Paint on skirting boards is long-lasting but aim to top it up every three to four years.
- Thoroughly clean the area and use a fine-grit sanding sheet of paper to it down.
- Tape up the edges of the skirting boards and apply the first coat of paint with even moves. If you’re going for a bold or dark colour, apply a layer of primer to keep the surface in good condition.
- Wait for the first layer to dry overnight, then apply a second coat. Follow the same process if a third coat is needed.
How do you re-grout tiles?
You can easily do this with an electric grout remover, but if you want to tackle it manually, follow these steps:
- Clean the tiles to get rid of any dirt or dust.
- Starting with a mould-resistant tile grout, mix the grout together, making sure not to form any air bubbles.
- Apply the grout to the tiles with a grout spreader using diagonal motions, making sure to fill in all the gaps.
- Let the grout sit for two to four minutes, then wipe off any excess with a damp, lint-free cloth, following the same diagonal motion.
How do you varnish floorboards?
Preparation is key, so cover up any minor gaps, scratches or chips before you start varnishing. Rent a special floor edging sander, put on a dust mask, and follow the below steps:
- Open door and windows to encourage air ventilation.
- Apply just the right amount of varnish, by dipping your pad into the mixture and testing it on a small area.
- Start from the corner of the room and follow the wood grain's direction by doing long, straight strokes.
- Allow the varnish base coat to dry for a few hours before applying the next layer. Aim to do two to three coats of varnish for the best result.
- Follow with a topcoat and let it dry overnight – the longer you let it dry, the better the results.
Visit Youtube.com
How do you remove wallpaper?
- Prepare a mixture of wallpaper stripper and hot water by following the manufacturer's instructions.
- Spray the solution onto a small section of the wall and let it sit for 5-10 minutes.
- Using a putty knife, gently peel off the wallpaper – don’t force the blade too much or you might damage the wall.
- Once you’ve finished removing the wallpaper strips, clean it with a sponge and water to get rid of residue and debris.
How do you drill out a screw?
- Drilling out a screw should be simple, but if it seizes up because of corrosion, dust, rust or debris, soak the area with penetrating oil (WD-40) to loosen it up.
- Use a screwdriver with a head that is an exact match of the screw you want to remove. Make sure it’s not too small to prevent driving it in further.
- Twist, turn and push the screwdriver by applying a steady inward force.
How do you hang a picture properly?
- Use painter’s tape to outline where the top of the picture frame should sit on the wall.
- Then, mark the frame edges on the wall before you start drilling or hammering.
- For a standard picture (A3 and below), mark the wall in the centre of the frame edges, approximately 15cm from the top of the frame. For a larger or heavier frame, drill two holes, again 15cm from the top.
- Hammer the nails or drill the holes gently into the wall so they lie flat. Use a spirit level to ensure they’re perfectly level.
- For a heavier picture, get the width of the picture and divide it into three to mark the exact hole position needed. For framed pictures, remember to measure some extra distance for the frame.
How do you build a firepit?
One of the easiest ways to create a fire pit is to use heat-resistant clay bricks. Before you start, make sure you plan the construction's size between 50cm and 1.5m, so you can easily control the fire. The layout is your choice. One tried-and-tested design is to arrange two rows of bricks in a square, leaving a small gap of 5mm between each brick to allow for sufficient airflow.
- Outline your fire pit location by digging a spade around the outer brick layer.
- Remove the bricks and dig out 2-3 cm of soil. Use a spirit level to check the surface is flat.
- Dig a 20-30 cm hole in the centre of your fire pit and fill it with small stones or gravel.
- Follow the initial brick layout pattern and build upwards until you reach your desired height.
Visit Youtube.com
How do you fix a leaky tap?
- Before you start, make sure the water supply is cut off from the shut-off valve.
- If you’re confident in your DIY skills, remove the knobs by using a flat-head screwdriver. You can proceed with the disassembly task by squirting some lubricant to take out the tap handle. Then, with the help of a spanner, remove the stem.
- Replace the seal, O-ring or the washer – whatever is causing the leak.
How do you remove a radiator?
If you want to give your walls a fresh look, replace the skirting board, or clean your radiator, removing the unit will make your life a lot easier. It can be a tricky job if you don’t take the right precautions, so ensure you have a radiator key, two adjustable wrenches, and a bowl.
- Switch off the heating system by turn the TRV valve on the radiator to 0. Then, use wrenches to turn the lock-shield valve off too.
- Drain all the radiator fluid – place a large bowl underneath and ease the fluid in by loosening the nut that attaches the pipe to the valve. Get the excess water out by inserting the radiator key into the bleed valve.
- Now that the radiator is isolated from the rest of the heating system, tilt the unit to allow all the water to get into the bowl. Get someone else to help, if needed.
- Gently lift the appliance off the brackets and fill the valve inlets with tissue paper to finish.
How do you reseal a bath?
- Remove the old sealant by using a scraper, then rinse it away.
- Use a cartridge gun to make a clear sealant line along the join. If you’re not experienced in bath resealing, try it out on a piece of card first.
- To get a professional finish with silicone sealant, dip your fingertip into white spirit and smooth the sealant by applying even pressure.
- Let it cure for a day to dry.
For more pro tips from Demi, visit FantasticServices.com
DISCLAIMER: We endeavour to always credit the correct original source of every image we use. If you think a credit may be incorrect, please contact us at [email protected].
/https%3A%2F%2Fslman.com%2Fsites%2Fslman%2Ffiles%2Fwebsite-images%2F2024%2F06%2Fmaiya03-1.jpg?itok=3cyHBZz4)