9 Tips To Take Better Photos On Your Phone
LOOK FOR THE LIGHT
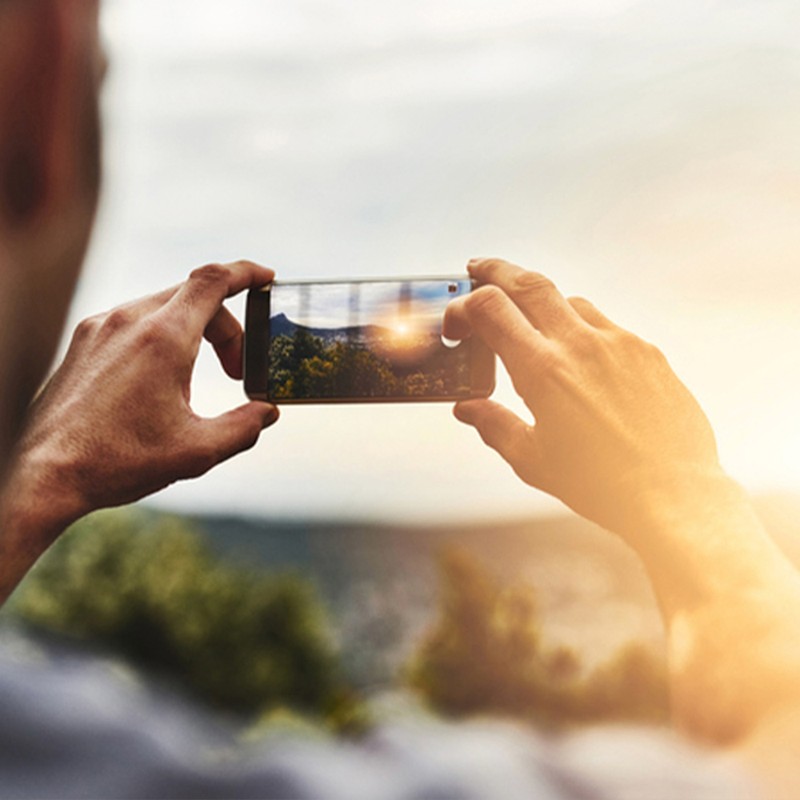
Light is one of the most important factors in any photo, and using natural light will mean you don't have to resort to your phone's built-in flash. Where possible, ensure your subjects are well-lit from the front and not silhouetted by a strong light – or in this case sunlight – from behind. If you’re indoors, try to set up your shot so there's light falling on your subject. That’s not to say artificial light can’t work too, but it’s likely you’ll need to take more care. Using the flash can help, but it’s always worth trying one shot with and one without to see what difference it makes. It’s worth bearing in mind that smartphones have very bright lenses, but their sensors are much smaller than those found in premium compact cameras, so they’re less likely to take good pictures in dim lighting.
ADJUST THE FOCUS & EXPOSURE
Considered one of the most basic manual adjustments you can make, exposure refers to the amount of light allowed into the frame. Focus will sharpen the overall view, with most camera phones programmed to automatically focus on the foreground unless told otherwise. Although both of these elements can be adjusted with photo editing software later down the line, it’s worth using your phone’s manual settings to get the best shot right off the bat. In the iPhone camera app, tap once to focus and bring up the confirmation box, then hold and drag the sun icon to adjust the exposure. You’ll notice the image brightens or darkens, accordingly. In the camera app for stock Android, tap once for focus, then adjust the exposure via the slider that pops up at the side or top of the screen.
USE HDR MODE
HDR, or High Dynamic Range, is now a staple feature on most smartphone camera apps and is often used to bring detail out of the darkest and lightest parts of an image and create a better balance of colours.. Particularly good for landscapes and portrait shots, you’ll notice it does take a few milliseconds longer to take a snap as a result, so try not to use it on fast-moving subjects or when you can't keep your phone steady. Simply open Settings > Camera, then scroll down until you see the HDR (High Dynamic Range) section. In here there are two options: Auto HDR, and Keep Normal Photo. The Auto HDR option will be turned on, but if you swipe to turn it off, the HDR button will then reappear in the camera app, allowing you to turn it on and off manually each time you come to capture an image.
TURN ON THE GRID
Adding grid lines in your phone's camera app won’t just help keep the horizon straight – it can help you apply some basic photography principles like the rule of thirds. You’ll see your image split into nine equal blocks that form a three-by-three grid. Aim to get the most interesting parts of your image near the corners of these segments, where the imaginary gridlines meet. On the stock Android camera app, you'll see the grid icon at the edge of the screen, while in iOS the grid option is under Photos & Camera in Settings.
TAKE PHOTOS IN BURSTS
Most phones now come with a built-in burst mode, which allows you to take multiple photos back to back, giving you plenty of options from which to choose. On both iOS and Android, activate this feature by holding down the shutter button in Photo modem or head to the camera settings to make changes to how burst mode works. iPhone owners should also check out Live Photos, which mixes still images and video together to create a truly unique composition.
PICK A FILTER
If you're on iOS, the iPhone camera comes with a selection of in-built filters – simply tap the icon in the top-right corner to see them and choose which effect suits your composition best. Portrait mode will also add an instant depth-of-field effect (where the subject remains sharp but the background is blurred), while the stock Google camera app has a lighting filter available via the thermometer icon. You can choose from pre-sets including cloudy and tungsten, so the colours look right regardless of the amount of natural light you’re working with.
EMBRACE NEGATIVE SPACE & DIFFERENT ANGLES
The term ‘negative space’ refers to the areas around and between the subjects of an image which are empty or free from colour or distraction – think a large expanse of open sky, an empty field, or a large wall. Having a lot of empty space in a photo will help your subject stand out more and evoke a stronger reaction from your viewer. Taking photos from an unexpected angle can also make them more memorable. Try taking a photo directly upward and playing with the sky as negative space, or from a slight downward angle, using the ground or pavement as your backdrop.
LOOK FOR LINES, PATTERNS & REFLECTIONS
When it comes to building an appealing composition, paying close attention to your detailed surroundings counts. Whether it’s symmetry, leading lines or just repetitive patterns and reflections, all will help frame or make an image more coherent – not to mention easy on the eye. Leading lines – whether it be architectural details, woodland footpaths or fences – all create a sense of depth in an image. You’ll know you’ve created a perfectly symmetrical image if it can be divided into two equal parts that are mirror images of each other.
TRY AN ADD-ON LENS
Some newer phone models offer dual rear cameras, with the second lens capturing a tighter or wider angle of view than your phone's main eye, while older models just offer one. A quality add-on lens will cost you, although experts agree a macro lens adds the most versatility to your phone's existing camera. Depending on the effect you’re after, you may prefer an ultra-wide, fish-eye, or a telephoto conversion lens.
For more information, tips and tricks, click here.
DISCLAIMER: We endeavour to always credit the correct original source of every image we use. If you think a credit may be incorrect, please contact us at [email protected].
