The Dos & Don’ts Of Good Bathroom Design
Barbara Sallick
Founder Of Waterworks
DO take time to plan your space carefully. To arrive at the best spatial layout and make the most thoughtful material selections, it’s important to be realistic. Look for inspiration on Instagram or in books and magazines, then move on to more practical considerations: the bones of the room, how much you want to spend and map out the different options so you know what’s possible.
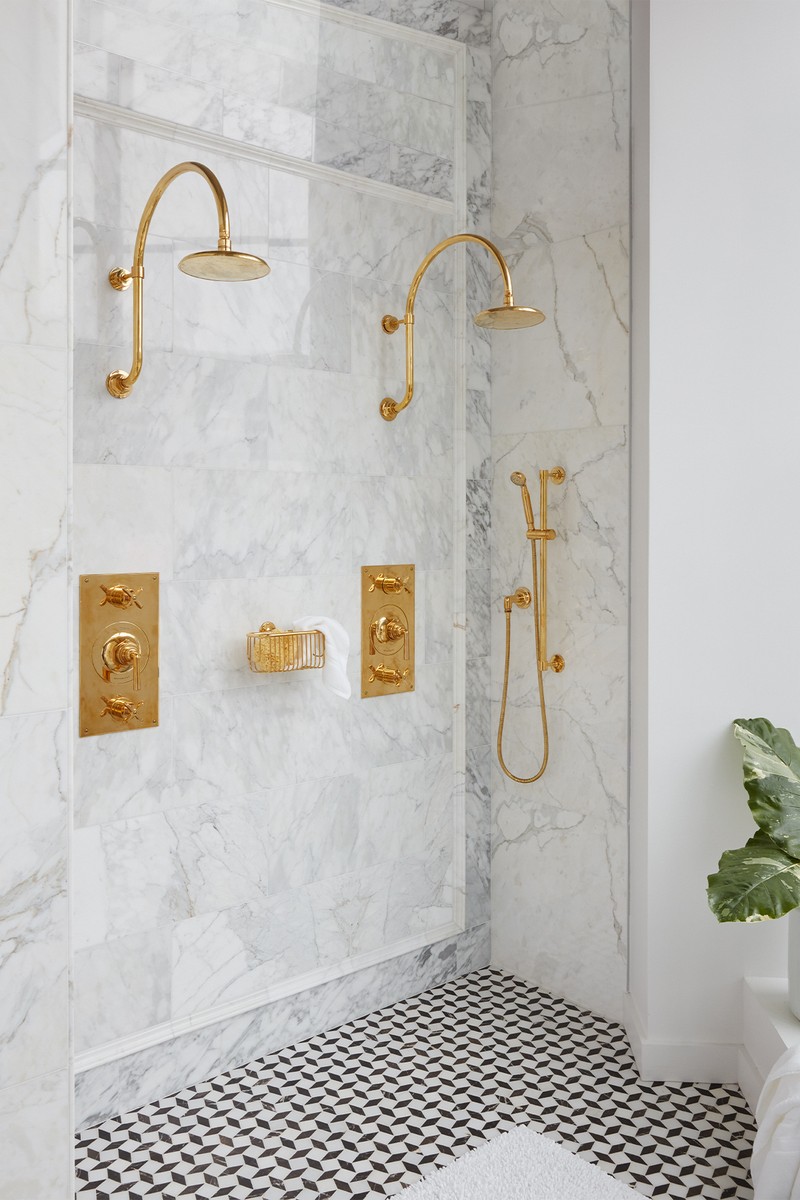
DO consider adding a hand shower to your walk-in shower. It makes rinsing and cleaning the shower enclosure almost effortless. When choosing a surface for the shower floor, don’t opt for large-format tiles. Small tiles works best in this area – the grout lines only add to the safety factor.
DO add thermostatic shower valves – either exposed or in the wall. They allow you to pre-set your ideal water temperature, ensuring optimal comfort for every shower.
DON’T select a bathtub on looks alone. Make sure it feels comfortable on your back and is long enough to stretch out. Think about other factors: do you want a thick acrylic bathtub with sound-deadening backing? Or a cast-iron bathtub that also muffles sound waves and retains heat longer?
DON’T forget to create a place to corral all of your bath and shower amenities. A built-in niche or metal basket is the best way to keep everything together. And be sure to add a hook to keep the washcloth off the floor. By considering all the little details, you’ll elevate your shower experience for years to come.
Visit Waterworks.com
Ruth Webber
Creative Director At Bert & May
DO avoid trends – it’s a common design mistake. Tiles are hardwearing and durable, which is why they’re a great material to use for bathroom walls, but it also means they’re harder to uninstall or update if you change your mind a year or two down the line. Focus instead on your personal style and choosing something you love.
DO create a splashback that is both practical and eye-catching. Antique patterned tiles in softly contrasting colours can create a statement splashback, whereas pastel shades which bring a subtle hint of colour to a space are everywhere right now. Simple geometrics can be used to add a pop of colour and contemporary feel; alternatively, a splashback in jewel-toned glazed tiles can look particularly striking.
DON’T just go for a safe white grout. Choose a colourful grout to elevate your bathroom design. It can highlight particular colours in patterned tiles, creating an unexpected pop of fun; or by using a contrasting colour it adds a layer of sophistication and depth. We love a dark grout where the finish adds texture, depth and intrigue, even as it fades and develops. It also hides a multitude of sins, so not only does it look sophisticated, it’s also extremely practical.
DON’T underestimate the versatility of glazed tiles. Their reflective quality will help a small space feel bigger, as the surface reflects more light around the room. A bright shade is versatile and timeless, and will enhance the enlarging qualities of the glazed tiles. We advise against using these for bathroom floors due to slip risk, but a glazed tile splashback or wall can provide a nice contrast with a matte floor tile.
Visit BertAndMay.com
James Lentaigne
Creative Director At Drummonds
DO ensure you have sufficient ventilation – it’s an element which is often overlooked. Make sure you have adequate ventilation to prevent the steam from baths or showers causing damage to nearby décor or furnishings.
DO measure the water pressure, as it can seriously restrict the waterflow to your shower. You need to check your home’s flow pressure (a builder/plumber can help you with this) and then ask your bathroom specialist which shower will perform best. In fact, all water delivery systems will have a minimum required pressure rating. It is important to choose the right taps, fillers or showers accordingly. Fitting a pump will also help the water flow if your pressure is not sufficient.
DO choose a bath that is durable and right for you. Most of our baths are made from cast iron which is a durable, strong and long-lasting material. When filled with hot water, it retains heat brilliantly. It is low maintenance and easy to clean, too. It’s also important to try a bath out to make sure it is comfortable. Don’t be embarrassed to get into baths in the showroom and give them a dry run to check they’re fit for purpose!
DON’T miscalculate measurements. This sounds like an obvious thing, but it’s important to properly measure all the elements of your bathroom, as this will dictate what you can realistically include in the scheme. Take into account how much space you have and need between the various items within the room, the scale and positioning of windows and doors, how much clearance room you need to comfortably open cabinets, etc.
DON’T put water drainage in the wrong place. Consider the access to drainage (i.e. the soil pipe) and other basic plumbing factors which may or may not limit your options. It can be expensive to move your soil pipe, so always seek expert advice if you’re going to relocate different bathroom elements.
Visit Drummonds-UK.com
Grazziella Wilson
Head Of Creative At Ca’ Pietra
DO order a sample first. Ordering either a swatch sample (a small cut of the full tile) or a full tile sample (the best for helping you envisage how it will look in your home) will help you to see the true colour, texture and finish on a tile. We also offer 30 x 40cm samples on our large-format tiles, including natural stone. These are particularly helpful in showing the pattern and tonal variations on natural stone products such as limestone and marble where no two are the same.
DO order enough tiles. It’s a common and sometimes costly mistake when ordering online, as it’s easy not to take wastage and breakages into consideration. Always order an extra 10% to cover this. Please note, when it comes to laying tiles in a herringbone formation (whether wall or floor), we recommend ordering an extra 15% to allow for all of those fiddly cuts. It’s also worth noting that different batches of tiles can vary in colour, so it’s even more important to get it right from the get-go, to prevent any mix-match shades in your design.
DO consider the size of your tile carefully. A larger bathroom will generally be able to accommodate large-format tiles. Another thing to think about is grout lines as these will impact the final result. The smaller the tile, the more grout lines, and this can make the space look busy. If lots of grout lines are unavoidable, try using a coloured grout in a similar shade to the tile to help them flow better.
DON’T use the wrong tile in the wrong place. Location will influence the type of tile you will want to go for. If it’s for a bathroom floor, for example, you’ll need to check whether it’s slip resistant or if it’s a wet room, and whether the tile is compatible with underfloor heating.
DON’T allow your efforts in finding the right tiles for your project be in vain. If you have purchased natural stone, or tiles that require sealing, ensure you seal them correctly and with the right product. Once your tiles are installed, you will need to use an impregnating sealant for protection against fading and staining, such as Stone Essentials Stain Block (or for crackle glaze tiles, a crackle glaze sealant). This should be applied after they have been installed and cleaned using Stone Essentials Deep Clean or similar, but prior to grouting, in accordance with the product label. You should apply a second coat after grouting. You could also choose to apply a surface finish such as Stone Essentials Stone Shield or Wax polish as this will offer further protection and give an attractive patina, although in non-wet areas only. This would be applied after grouting once fully dry (around seven days depending on humidity).
Visit CaPietra.com
Luke Thomas
Design Director At John Cullen Lighting
DO integrate lighting controls to allow flexibility within the room, offering different scenarios depending on mood and task lighting for every function. Ensure that everything is dimmable so you can achieve a spa-like feel to relax in the evening, or brighter light for applying make-up or shaving. Having the flexibility of different circuits will allow you to transform the room.
DO consider your finishes – they can play a big part in how you choose your lighting and are often overlooked. If you are adding a low-level floating effect under a vanity unit and have a shiny floor, you would see the dotty reflection which would ruin the illusion. In this instance you would need to position your LED strip carefully and use a frosted profile. You might also consider using a single-point light source, on a PIR sensor for night-time visits.
DON’T put a downlight straight above your head – it causes unflattering shadows and is a far from ideal task light. The best task lighting is achieved by lighting either side of the face – this may be with pendant or wall lights, or frosted strips integrated into mirrors. Backlighting the mirror is another way to achieve this; it creates a dramatic floating effect, while providing efficient light to the face.
DON’T forget you are lighting a humid, wet space. For any lighting within the bathroom, it is essential to consider if you require any IP-rated fittings. The rating will vary based on proximity to water sources. In a shower you should be looking for IPX4 and above. If your ceiling heights are above 2.25m, you do not need an IP-rated fitting everywhere.
Visit JohnCullenLighting.com
DISCLAIMER: We endeavour to always credit the correct original source of every image we use. If you think a credit may be incorrect, please contact us at [email protected].


/https%3A%2F%2Fslman.com%2Fsites%2Fslman%2Ffiles%2Farticles%2F2023%2F02%2Fjade-herringbone-samuel-heath-little-greene-pooky-1.jpeg?itok=9pJJDrl8)


